> For the complete documentation index, see [llms.txt](https://help.usejimo.com/docs/llms.txt). Markdown versions of documentation pages are available by appending `.md` to page URLs; this page is available as [Markdown](https://help.usejimo.com/docs/experiences/surveys/components.md).

# Components

## Components for Building Surveys

### Ask

**Collect user data** with a variety of question types, allowing participants to vote, select options, or provide open-ended feedback.

<table data-card-size="large" data-view="cards"><thead><tr><th align="center"></th><th><select multiple><option value="qHvT3LF0tTZr" label="Guide" color="blue"></option><option value="7O8gaYiJrJQ7" label="Announce" color="blue"></option><option value="8wbvMXRZZjTc" label="Engage" color="blue"></option><option value="u5Kf5KyEITOV" label="Targeted" color="blue"></option><option value="XKQtNWsfeJiD" label="Ask" color="blue"></option><option value="OH4kmWjUXnjx" label="Test" color="blue"></option><option value="xHMPttcl06de" label="Say" color="blue"></option></select></th><th data-hidden data-card-cover data-type="files"></th><th data-hidden data-card-target data-type="content-ref"></th></tr></thead><tbody><tr><td align="center"><strong>NPS</strong></td><td><span data-option="XKQtNWsfeJiD">Ask</span></td><td><a href="/files/nFWBnyqTQ1bhYQXuf5Pb">/files/nFWBnyqTQ1bhYQXuf5Pb</a></td><td></td></tr><tr><td align="center"><strong>Multiple Choice</strong></td><td><span data-option="XKQtNWsfeJiD">Ask</span></td><td><a href="/files/Pcw61Bht2JKsyrLkxH0d">/files/Pcw61Bht2JKsyrLkxH0d</a></td><td></td></tr><tr><td align="center"><strong>Slider</strong></td><td><span data-option="XKQtNWsfeJiD">Ask</span></td><td><a href="/files/cxrOMVOPPEHaZg941UGH">/files/cxrOMVOPPEHaZg941UGH</a></td><td></td></tr><tr><td align="center"><strong>Opinion Scale</strong></td><td><span data-option="XKQtNWsfeJiD">Ask</span></td><td><a href="/files/Da6x5HrO3w9ZLJtQ8i8K">/files/Da6x5HrO3w9ZLJtQ8i8K</a></td><td></td></tr><tr><td align="center"><strong>Open Question</strong></td><td><span data-option="XKQtNWsfeJiD">Ask</span></td><td><a href="/files/nGI5fEz2vHClyWczYvug">/files/nGI5fEz2vHClyWczYvug</a></td><td></td></tr></tbody></table>

**⇒ Perfect for** gathering opinions, measuring satisfaction, or validating ideas in a straightforward, responsive way.

#### **NPS**

Collect **Net Promoter Score** by asking users how likely they are to recommend your product.

<figure><img src="/files/Oi9RcTm6WD50iZ1xFd92" alt=""><figcaption></figcaption></figure>

**⇒ Perfect for** measuring overall loyalty or satisfaction at key points in the user journey.

#### **Multiple Choice**

Present a set of **predefined options** for quick user selection.

<figure><img src="/files/pQV7ebw4zLyx8eEW8Vou" alt=""><figcaption></figcaption></figure>

**⇒ Perfect for** identifying user preferences, validating ideas, or segmenting responses based on chosen answers.

#### **Slider**

Allow users to **pick a value** on a continuous scale by dragging a slider.

<figure><img src="/files/7rYKHi9Z8Iqjm2zTz2Bu" alt=""><figcaption></figcaption></figure>

**⇒ Perfect for** gauging intensity or sentiment when numerical precision is important (e.g., budget ranges, satisfaction levels).

#### **Opinion Scale**

Use a **3 to 7, star or emoji-based** scale to capture user sentiment.

<figure><img src="/files/htSHfGcObQXoXfLnosN4" alt=""><figcaption></figcaption></figure>

**⇒ Perfect for** quick emotional checks, simple ratings, or micro-feedback on features.

#### **Open Question**

Invite **free-form text** input for more detailed user responses.

<figure><img src="/files/WdYv2wEe8uVzkTnaG8Cw" alt=""><figcaption></figcaption></figure>

**⇒ Perfect for** gathering extensive feedback, feature suggestions, or user stories in their own words.

### Test

**Showcase external content** (e.g., prototypes, calendars) and encourage users to interact or respond directly.

<table data-card-size="large" data-view="cards"><thead><tr><th></th><th><select><option value="SNo5AvOuDCWU" label="Say" color="blue"></option><option value="GTUiQutreA2Z" label="Ask" color="blue"></option><option value="7pEADxUaX1RR" label="Test" color="blue"></option></select></th><th data-hidden data-card-cover data-type="files"></th></tr></thead><tbody><tr><td><strong>Concept Test</strong></td><td><span data-option="7pEADxUaX1RR">Test</span></td><td><a href="/files/WE39o4cArbcfWrlPrf7h">/files/WE39o4cArbcfWrlPrf7h</a></td></tr><tr><td><strong>Interview Prompt</strong></td><td><span data-option="7pEADxUaX1RR">Test</span></td><td><a href="/files/wShAfhpbM678R9j8UnZs">/files/wShAfhpbM678R9j8UnZs</a></td></tr></tbody></table>

**⇒ Perfect for** validating concepts, scheduling follow-ups, or gathering in-depth feedback on mockups or design elements.

#### **Concept Test**

Showcase a **mockup, prototype, or description** and gather reactions.

<figure><img src="/files/n1NVfmsUcIaLYcfavO8p" alt=""><figcaption></figcaption></figure>

**⇒ Perfect for** validating designs or ideas before further investment, leveraging direct user feedback on visuals or concepts.

#### **Interview Prompt**

Prompt users to **volunteer for interviews** or deeper usability testing.

<figure><img src="/files/t0ELJIeensdELDfs6FVd" alt=""><figcaption></figcaption></figure>

**⇒ Perfect for** finding engaged participants who are willing to provide more in-depth insights or schedule a follow-up session.

### Say

**Deliver messages** without expecting a user response, acting like a mini modal within a survey.

<table data-card-size="large" data-view="cards"><thead><tr><th align="center"></th><th><select multiple><option value="qHvT3LF0tTZr" label="Guide" color="blue"></option><option value="7O8gaYiJrJQ7" label="Announce" color="blue"></option><option value="8wbvMXRZZjTc" label="Engage" color="blue"></option><option value="mx2lDWHxcE2e" label="Say" color="blue"></option></select></th><th data-hidden data-card-cover data-type="files"></th><th data-hidden data-card-target data-type="content-ref"></th></tr></thead><tbody><tr><td align="center"><strong>Text Block</strong></td><td><span data-option="mx2lDWHxcE2e">Say</span></td><td><a href="/files/IT30xHSoNjs6ysZi63En">/files/IT30xHSoNjs6ysZi63En</a></td><td><a href="/pages/qrHNXuTyi3dAFJXltrYG#tooltip">/pages/qrHNXuTyi3dAFJXltrYG#tooltip</a></td></tr><tr><td align="center"><strong>Thank You</strong></td><td><span data-option="mx2lDWHxcE2e">Say</span></td><td><a href="/files/I7o4DXRCFQTqEJa5iHT1">/files/I7o4DXRCFQTqEJa5iHT1</a></td><td></td></tr></tbody></table>

**⇒ Perfect for** providing context, guiding participants between question sets, or thanking them upon completion.

#### **Text Block**

Present **informational text or instructions** without requiring a response.

<figure><img src="/files/hvYwSd1SVSRbonN65ROK" alt=""><figcaption></figcaption></figure>

**⇒ Perfect for** providing context, guiding users through sections of the survey, or clarifying key points between questions.

#### **Thank You**

Offer a **final message** or confirmation once the survey is completed, same as a text block but you can add animations on display like confetti.

<figure><img src="/files/BFhofRkVFx2qGnONnqj6" alt=""><figcaption></figcaption></figure>

**⇒ Perfect for** showing gratitude, giving a summary, or directing users to additional resources after they finish.

***

## Customizing Your Steps

To create **engaging and effective Surveys**, you can combine **Ask**, **Test**, and **Say** question types with additional elements that guide users, offer context, or invite interaction. Each element is **fully customizable** from the **Content Builder**, ensuring your survey aligns with your brand and objectives.

### Add Elements

<figure><img src="/files/JY5e2wkIobCZb10qiBdw" alt=""><figcaption></figcaption></figure>

### Available Elements

<figure><img src="/files/gZVlzC9Kh7Ha7kaPsL5f" alt=""><figcaption><p>Components building blocks</p></figcaption></figure>

<details>

<summary><strong>Text Elements</strong></summary>

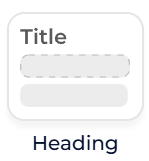
* **Heading:**\
  Craft compelling titles and headers to grab attention and set the context.
* **Paragraph:**\
  Convey detailed information with descriptive text to guide users through the experience.
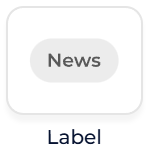
* **Label:**\
  Use labels to annotate images, videos, and other interactive elements for clarity.

</details>

<details>

<summary><strong>Media Assets</strong></summary>

* **Image/Video:**\
  Enhance your component with illustrative images or explanatory videos.&#x20;

  *<mark style="color:blue;">(5MB size limit)</mark>*
* **Profile:**\
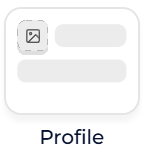
  Personalize the experience by including profile pictures or avatars, which are particularly effective in social proof or testimonial components.

</details>

<details>

<summary><strong>Interactions</strong></summary>

* **Primary Button (CTA):**\
  Encourage users to take action with a prominently styled button.
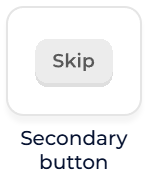
* **Secondary Button (CTA):**\
  Offer an alternative action with a less dominant button style.
* **Stepper:**\
  Include a stepper for multi-step processes, guiding users through a sequence of actions or content.
* **Cross:**\
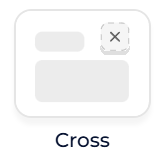
  Allows users to dismiss or snooze the experience by clicking a closing cross in the corner.

</details>

***

## Elements Parameters

After assembling your survey’s steps in the **Flow Builder**, it’s time to refine **each element** in the **Content Builder** to ensure your questions are clear, engaging, and visually cohesive. Every component, whether it’s a rating scale, an open-ended question, or a “Thank You” message, comes with **specific parameters** you can adjust.

<figure><img src="/files/KD8RbMzTtFjiPTKTG0WV" alt=""><figcaption></figcaption></figure>

### Main Step

When you click on the top of the [navigator](/docs/build/navigator.md) arborescence, you access the **Main Step Parameters**.&#x20;

<figure><img src="/files/7H4VzvEHsFEUA23uOSKl" alt=""><figcaption></figcaption></figure>

These parameters are organized into different sections within the parameter sidebar, allowing comprehensive customization from top to bottom.&#x20;

<details>

<summary><strong>Type</strong></summary>

Change the style of your step (e.g., from Tooltip to Modal). Switching the step type does not remove or alter any parameters; unused or disappearing parameters remain intact, allowing you to revert to a previous type without losing your configurations.

***If you want different styles mid-survey, you must split your questions into multiple surveys.***

<img src="/files/4R3KRVquR0EmU9NKTNKh" alt="" data-size="original">

* **Step Type:** Select the desired step style from the dropdown menu
  * **Options:** Tooltip, Snippet, Modal, Badge

</details>

<details>

<summary><strong>General</strong></summary>

Contains parameters specific to the selected step style type, enabling functionality tailored to the step's purpose. The **General** section varies based on the step type, providing unique customization options where necessary.

**Modal**

* **Position:** Modals have a unique, fixed placement and do not require additional positioning parameters.

**Snippet**

![](/files/pKXYLBkHfsWdEKwQU7kg)

* **Position:** Defines the fixed position where the Snippet appears on the screen.
  * **Options:**
    * **Corners:** Top-left, Top-right, Bottom-left, Bottom-right
    * **Centered:** Center-top, Center-bottom

**Tooltip & Badge**

![](/files/uHK3xDUFW1xxmCW5tgrf)

* **Position:** Access all [positioning options](/docs/build/positioning.md) to define where the Tooltip or Badge appears relative to the target UI element.
  * **Options:**
    * **CSS Selector:** Define the target element using a CSS selector or select manually.
    * **Relative Placement:** Choose from auto-placement, fixed options, or custom offsets.
    * **Z-Index:** Set the z-index value to control layering.
    * **Target Highlight** (Tooltips Only)**:** Add or remove a pointer and borders around the target element.

</details>

<details>

<summary><strong>Behavior</strong></summary>

Define how the step behaves in response to user interactions, ensuring the step responds appropriately to user actions.

![](/files/6KpciloQXnFa1aLf0PXt)

* **Answer Required** (*Only for Ask-type steps*): Determines whether users must answer the current question before proceeding.
  * **Options:**
    * **Toggle On:** The “Next” or “Continue” CTA remains disabled until the user provides an answer.
    * **Toggle Off:** The user can skip this question and still advance to the next step.
* **To Show** *(Only for Badge-style steps)***:** Determines how the card associated with the Badge is displayed alongside the icon.
  * **Options:**
    * **On Click:** The card appears when the user clicks the Badge icon.
    * **On Hover:** The card appears when the user hovers over the Badge icon.
    * **Always Open:** The card is always visible alongside the Badge icon.
* **To Dismiss:** Specifies how users can close the experience. Closing is logged as dismissed in the stats, not as completed.
  * **Options:**
    * **Can't Be Dismissed:** Users cannot close the step manually.
    * **Click the Cross:** Users can close the step by clicking the closing cross icon.
    * **Click Outside:** Users can close the step by clicking anywhere outside the step component.
    * **Both:** Users can close the step by either clicking the cross or clicking outside the step component.

</details>

<details>

<summary><strong>Layout</strong></summary>

Adjust the dimensions and spacing of the step to ensure proper layout and visual harmony within your user interface.

![](/files/bnR762xHNisfRm8ukEpJ)

* **Width:** Set the width of the step component.
  * **Options:**
    * **Auto:** Automatically adjusts based on content.
    * **Custom:** Specify a pixel size using the slider or enter the value directly.

* **Height:** Set the height of the step component.
  * **Options:**
    * **Auto:** Automatically adjusts based on content.
    * **Custom:** Specify a pixel size using the slider or enter the value directly.

* **Padding:** Add vertical or horizontal padding in pixels between the side of the step card and the elements within (paragraph, image, etc.).
  * **Options:**
    * **Vertical Padding:** Specify the padding in pixels.
    * **Horizontal Padding:** Specify the padding in pixels.

* **Gap:** Add a gap in pixels between elements within the card.
  * **Options:**
    * **Gap Size:** Specify the gap size using the slider or enter the value directly.

</details>

<details>

<summary><strong>Style</strong></summary>

Customize the overall visual appearance of the step card to align with your brand and enhance user engagement.

![](/files/jlGNWUDpRrEnAUAtZXGg)

* **Shadow:** *(Optional)* Add a shadow effect around the step card to create depth.
  * [**Options:**](#user-content-fn-1)[^1]
    * **Shadow Color:** Select the color of the shadow (remove it using the cross).
    * **X Offset (px):** Define the horizontal displacement of the shadow.
    * **Y Offset (px):** Define the vertical displacement of the shadow.
    * **Blur (percentage):** Adjust the blur intensity of the shadow.

* **Radius:** Set the roundness of the step card's corners.
  * **Options:**
    * **Percentage:** Choose a value between 0% (sharp corners) and 50% (fully rounded corners).

* **Background:** Define the main color of the step card's background.
  * [**Options:**](#user-content-fn-2)[^2]
    * **Color Mode:**
      * **Single Color:** Select a plain background color.
    * **Gradient Mode:**
      * **Color 1:** Choose the first color of the gradient.
      * **Color 2:** Choose the second color of the gradient.
      * **Gradient Type:**
        * **Classic Fixed Gradient:** A static gradient transition.
        * **Animated Gradient:** A dynamic gradient transition with movement.

* **Border:** *(Optional)* Add a border around the step card to define its boundaries.
  * **Options:**
    * **Border Color:** Select the color of the border (remove it using the cross).

* **Overlay:** *(Optional)* Apply an overlay to gray out the rest of the screen, highlighting the step card.
  * **Options:**
    * **Overlay Color:** Choose the color and opacity of the overlay to ensure the step card stands out (remove it using the cross).

</details>

<details>

<summary><strong>Animation</strong></summary>

Manage visual effects applied to the step. Define how steps animate when they appear or disappear, enhancing the user experience through smooth and engaging transitions.

![](/files/47Ddyu7BTMNOVa6gcOjI)

* **Elements:** Enable or disable animation for each element within the card.
  * **Options:**
    * **Yes:** Apply animation to each element.
    * **No:** Do not apply animation to individual elements.

* **In:** How the step appears on the screen.
  * [**Options:**](#user-content-fn-3)[^3]
    * **None:** No animation.
    * **Fade:** Fade into view.
    * **Slide from Up:** Slide in from the top.
    * **Slide from Down:** Slide in from the bottom.
    * **Slide from Left:** Slide in from the left.
    * **Slide from Right:** Slide in from the right.

* **Out:** How the step disappears from the screen.
  * [**Options:**](#user-content-fn-4)[^4]
    * **None:** No animation.
    * **Fade:** Fade out of view.
    * **Slide to Up:** Slide out to the top.
    * **Slide to Down:** Slide out to the bottom.
    * **Slide to Left:** Slide out to the left.
    * **Slide to Right:** Slide out to the right.

</details>

***

### Special Elements

This section encompasses parameters specific to certain experience types, providing additional customization options to enhance user interactions.

#### Target Element Parameters

Located at the top of the [navigator](/docs/build/navigator.md), this section provides access to all [positioning options](/docs/build/positioning.md), mirroring those found in the General section of the Main Step Parameters.

<figure><img src="/files/bXEdE30tKsNdVGuFn5NW" alt=""><figcaption></figcaption></figure>

<details>

<summary><strong>Target Element</strong></summary>

Configure how the step is attached to a specific UI element.

![](/files/iNzCw9A2XpS9G96RCT6e)

* **Position:** Access all [positioning options](/docs/build/positioning.md) to define where the Tooltip or Badge appears relative to the target UI element.
  * **Options:**
    * **CSS Selector:** Define the target element using a CSS selector or select manually.
    * **Relative Placement:** Choose from auto-placement, fixed options, or custom offsets.
    * **Z-Index:** Set the z-index value to control layering.
    * **Target Highlight** (Tooltips Only)**:** Add or remove a pointer and borders around the target element.

</details>

<details>

<summary><strong>Effects</strong></summary>

Add visual flair to highlight the targeted element more prominently.

![](/files/bteI3ynATHbJEcC7mwQa)

* **Type:** Choose the style of the highlighting effect.
  * **Options:**
    * **None:** No additional highlighting beyond standard positioning.
    * **Glow:** A soft glow radiates around the targeted element.
    * **Shimmer:** A moving highlight sweeps across the element periodically.
* **Color:** Define the color of the glow or shimmer effect.
  * **Options:**
    * **Color Picker:** Select a color from the palette.
    * **Hex Input:** Enter a specific hex color code.
* **Speed:** Adjust the animation speed or frequency of the effect.
  * **Options:**
    * **Slider:** Move to set faster or slower animation intervals.
    * **Direct Input:** Enter a numeric value indicating refresh or pulse rate

</details>

***

#### Hotspot parameters

Exclusive to the **Badge** step type, the Hotspot section allows you to customize the badge pin icon to draw user attention effectively.

<figure><img src="/files/7mDQyYMJLVdsB0Onu6iq" alt=""><figcaption></figcaption></figure>

<details>

<summary><strong>Behavior</strong></summary>

Defines how the badge behaves when interacted with by the user.

![](/files/2gBUjzYGIpSBhcQLETMi)

* **On Click:** Defines the behavior when the user clicks the badge pin to expand the badge content.
  * **Options:**
    * **Hide:** The badge content hides after being clicked.
    * **Persist:** The badge content remains visible once clicked.

</details>

<details>

<summary><strong>Style</strong></summary>

Customize the visual aspects of the badge pin to align with your brand and design preferences.

![](/files/2vY7LnmJIc1ejnXDj99r)

* **Shape:** Determines the visual appearance of the badge pin.
  * **Options:**
    * **Plain Dot:** A simple circular pin.
    * **Question Mark:** A pin featuring a question mark icon.
    * **Info Icon:** A pin featuring an information icon.
* **Animation:** *(Only available for the Plain Dot shape)* Adds a pulsating effect to make the pin more eye-catching.
  * **Options:**
    * **Pulse:** The pin gently pulsates to attract attention.
    * **No:** The pin remains static without any animation.
* **Position:** Provides quick access to [positioning options](/docs/build/positioning.md) to define where the Tooltip or Badge appears relative to the target UI element, same as those found in the main step parameters.
  * **Options:**
    * **CSS Selector:** Define the target element using a CSS selector or select manually.
    * **Relative Placement:** Choose from auto-placement, fixed options, or custom offsets.
    * **Z-Index:** Set the z-index value to control layering.
    * **Target Highlight** (Tooltips Only)**:** Add or remove a pointer and borders around the target element.
* **Hotspot Size:** Sets the diagonal size of the badge pin in pixels.
  * **Options:**
    * **Slider:** Adjust the size using a slider control.
    * **Direct Input:** Enter the desired pixel value manually.
* **Color:** Defines the color of the badge pin icon.
  * **Options:**
    * **Color:** Select a color from the palette.

</details>

### Survey-Specific Steps

Unlike Tours (where each step can be a different style), **Survey steps** all **share the same style** but differ in **function**. When you add an NPS, Multiple Choice, or any other *Ask / Test / Say* step, an additional **“question-specific” element** appears in the [navigator](/docs/build/navigator.md).

<figure><img src="/files/58A5tMStZDdfOj76EJUd" alt=""><figcaption></figcaption></figure>

**Fixed Position in Navigator:** Each question type has a dedicated node in the tree you **cannot remove**, ensuring every step’s core functionality remains intact.

#### NPS

This step displays two labels (left and right), with numbers in between, and allows styling options to fit your survey’s look and feel.

<figure><img src="/files/45s3pWLcMklLCAFRADsy" alt=""><figcaption></figcaption></figure>

<details>

<summary><strong>Style</strong></summary>

Manages how the NPS scale and labels appear, including any applied animations and visual spacing.\
![](/files/qL8K4qYns0GihRXtlYcP)

* **Animation:** Enables or disables the main step’s configured animation for the NPS scale.\
  **Options:**
  * **Yes:** Inherits slide, fade, or other effects from the main step.
  * **No:** The NPS element remains static, ignoring any main step animations.

* **Left Label:** Text for the low/negative end of the scale (default: "Feel very bad").\
  **Options:**
  * **Editable Text Field:** Change the displayed label.

* **Right Label:** Text for the high/positive end of the scale (default: "Feel very good").\
  **Options:**
  * **Editable Text Field:** Change the displayed label.

* **Font Size:** Sets the text size for labels and numbers.\
  **Options:**
  * **Slider or Direct Input:** Specify a pixel value.

* **Padding (Vertical & Horizontal):** Controls the space around the NPS component.\
  **Options:**
  * **Vertical:** Enter a pixel value for top/bottom spacing.
  * **Horizontal:** Enter a pixel value for left/right spacing.

* **Font Family:** Selects the typeface for labels and numbers.\
  **Options:**
  * **Dropdown:** Pick from available fonts.
  * **Search Bar:** Locate a custom or uploaded font.

* **Labels Color** *(Optional):* Defines a custom color for the left and right labels (default: black).\
  **Options:**
  * **Color Picker:** Choose from the palette.
  * **Hex Input:** Enter a hex code.

</details>

#### Multiple Choice

This step includes a dedicated **Options** section for creating and editing choices, and a **Layout** section for styling how those choices appear.

<figure><img src="/files/QTDixmFnvVsoyaZXSCZM" alt=""><figcaption></figcaption></figure>

<details>

<summary><strong>Options</strong></summary>

Manage the content and structure of your MCQ options.

![](/files/Vqq055zCaMLn9YEbZnW9)

* **Option 1 & Option 2:** Default placeholders for at least two choices.\
  **Options:**
  * **Editable Labels:** Rename or edit each choice’s text.
  * **Minimum of Two:** You can’t remove both options; at least two must remain.

* **+ Icon:** Use the plus icon to add additional choices to the MCQ.\
  **Options:**
  * **New Choice:** Labeled “Choice 3,” “Choice 4,” etc., by default.
  * **Trash Icon:** Delete an unwanted choice from the list.

</details>

<details>

<summary><strong>Layout</strong></summary>

Define how the MCQ answer block appears and functions within your survey.

![](/files/Arsxh2gLCItgocfXIRLx)

* **Choice Type**\
  Determines whether participants can select a single option or multiple options.\
  **Options:**

  * **Single:** Only one choice can be selected at a time.
  * **Multiple:** Users can pick several choices from the list.

* **Checkbox**\
  Toggles the display of a checkbox alongside each option.\
  **Options:**

  * **Yes:** Place a checkbox to indicate each selection visually.
  * **No:** Selected options are highlighted without a checkbox.

* **Disposition**\
  Chooses how the MCQ options are arranged on the screen.\
  **Options:**

  * **Inline:** Options appear side by side, wrapping if necessary.
  * **Block:** Each option takes a full-width row, stacking vertically.

* **Font Family**\
  Selects the typeface used for the option labels.\
  **Options:**

  * **Dropdown:** Pick from available fonts.
  * **Search Bar:** Locate a custom or uploaded font.

* **Font Size**\
  Adjusts the text size for each MCQ option label.\
  **Options:**

  * **Slider or Direct Input:** Enter a pixel value (e.g., 16px).

* **Font Weight**\
  Determines the boldness or thickness of the option text.\
  **Options:**

  * **Dropdown:** Choose from normal, bold, bolder, etc.

* **Padding**\
  Controls spacing around each MCQ option, creating separation from adjacent text or survey elements.\
  **Options:**

  * **Vertical & Horizontal:** Enter pixel values for top/bottom and left/right padding.

* **Gap**\
  Sets the space between individual MCQ options.\
  **Options:**

  * **Slider or Direct Input:** Pixel value for spacing.

* **Radius**\
  Defines the roundness of the option containers (if any).\
  **Options:**

  * **0% (Sharp):** Square corners.
  * **50% (Fully Rounded):** Pill-shaped containers.

* **Color**\
  Determines the text or background color for MCQ options.\
  **Options:**

  * **Color Picker:** Choose from a palette.
  * **Hex Input:** Enter a specific hex code.

* **Shadow**\
  Adds a subtle or pronounced drop shadow behind each option container.\
  **Options:**
  * **Shadow Color & Offsets:** Configure using a color picker and numeric values.
  * **Remove:** Click the cross icon to disable.

</details>

#### Slider

Allows users to pick a value on a continuous scale, often represented by a draggable handle from left (minimum) to right (maximum).

<figure><img src="/files/8apTPhqg291Gw2uBk8Rt" alt=""><figcaption></figcaption></figure>

<details>

<summary><strong>Style</strong></summary>

Manages how the slider is displayed and labeled, including optional emoji handles, colors, and animations.

![](/files/u68c267IIBtIpbk3Keac)

* **Size:** Sets the thickness or handle size of the slider in pixels.\
  **Options:**

  * **Slider or Direct Input:** Enter a pixel value (e.g., 6px).

* **Color:** Defines the color of the slider’s main handle or active track.\
  **Options:**

  * **Color Picker:** Choose from a palette.
  * **Hex Input:** Enter a specific hex code (e.g., #1260ebb3).

* **Background:** Specifies the color behind the slider’s active track.\
  **Options:**

  * **Color Picker:** Pick a palette color.
  * **Hex Input:** Enter a hex code (e.g., #1260eb29).

* **Font Family:** Selects the typeface for any labels or numbers displayed with the slider.\
  **Options:**

  * **Dropdown:** Choose from available fonts.
  * **Search Bar:** Locate a custom or uploaded font.

* **Labels Color:** Controls the color of left/right labels indicating min/max or negative/positive ends.\
  **Options:**

  * **Color Picker:** Pick from a palette.
  * **Hex Input:** Enter a hex code (e.g., #1557DB).

* **Emoji:** Choose emoji icon to the slider handle.\
  **Options:**

  * **Select Emoji:** Choose from an emoji library (default: “🔥”).

* **Animation:** Determines if the main step’s animation applies to elements within the slider card.\
  **Options:**

  * **Yes:** Inherits slide, fade, or other effects from the main step.
  * **No:** The slider element remains static, ignoring animations.

* **Left Label:** Text indicating the lower or “bad” end of the scale (default: “really bad”).\
  **Options:**

  * **Editable Text Field:** Change to any short descriptor.

* **Right Label:** Text indicating the higher or “good” end of the scale (default: “really good”).\
  **Options:**
  * **Editable Text Field:** Change to any short descriptor.

</details>

#### Opinion Scale

Allows users to express sentiment or rating across discrete steps (e.g., 1–5), often with symbolic icons (stars or smileys).

<figure><img src="/files/anvtrObx3hKoNQnmNUgi" alt=""><figcaption></figcaption></figure>

<details>

<summary><strong>Style</strong></summary>

Manages how the Opinion Scale is displayed, including the number of steps and the visual icons used.

![](/files/SS1HbZQhFz3MjayGqyCG)

* **Steps:** Defines how many distinct points the user can choose from (default: 5).\
  **Options:**

  * **Slider or Direct Input:** Enter the total number of steps (e.g., 3, 5, 7).

* **Type:** Selects the icon style for each step (e.g., stars or smileys).\
  **Options:**

  * **Smiley:** Renders faces from sad to happy.
  * **Stars:** Uses star icons to represent each rating point.

* **Left Label:** Text indicating the lower or “bad” end of the scale (default: “very bad”).\
  **Options:**

  * **Editable Text Field:** Change the descriptor to fit your context.

* **Right Label:** Text indicating the higher or “good” end of the scale (default: “very good”).\
  **Options:**

  * **Editable Text Field:** Change to any short descriptor.

* **Size:** Adjusts the size of each icon in pixels.\
  **Options:**

  * **Slider or Direct Input:** Enter a pixel value (e.g., 20px).

* **Padding:** Controls spacing around the Opinion Scale element.\
  **Options:**

  * **Vertical & Horizontal:** Enter pixel values for top/bottom and left/right padding (e.g., 8px).

* **Font Family:** Selects the typeface for any labels or numbers displayed with the scale.\
  **Options:**

  * **Dropdown:** Choose from available fonts.
  * **Search Bar:** Locate a custom or uploaded font.

* **Labels Color:** Assigns a custom color to the left and right labels.\
  **Options:**
  * **Color Picker:** Select from a palette.
  * **Hex Input:** Enter a specific hex code.

</details>

#### Open Question

Allows users to provide free-form text feedback, capturing richer insights than fixed options.

<figure><img src="/files/1UMZ4Y6HDii8WyiYCALa" alt=""><figcaption></figcaption></figure>

<details>

<summary><strong>Content</strong></summary>

Defines the placeholder text and general setup of the response field.

![](/files/Uvq83JqAGkR42zRIEQxP)

* **Enter Your Answer:** Placeholder message prompting the user to type a response.\
  **Options:**
  * **Editable Text Field:** Change the placeholder text (e.g., “Share your thoughts...”).

</details>

<details>

<summary><strong>Style</strong></summary>

Controls the appearance of the open text box.

![](/files/lBNdgh7QQmzCOiLzxN04)

* **Background:** Sets a color behind the response field (default: #f3f3f3ff).\
  **Options:**

  * **Color Picker:** Select from a palette.
  * **Hex Input:** Enter a specific hex code.

* **Radius:** Adjusts how rounded the corners of the text box are (default: 6px).\
  **Options:**
  * **Slider or Direct Input:** Enter a pixel or percentage value (e.g., 6, 8, 10%).

</details>

#### Concept Test

Allows you to showcase a prototype, mockup, or design concept within your survey and gather feedback in context.

<figure><img src="/files/UpYMFx7d4v5qXRqPZE0S" alt=""><figcaption></figcaption></figure>

<details>

<summary><strong>Prototype</strong></summary>

Embeds an interactive or static prototype from design platforms like Figma or Invision, providing users an opportunity to view and respond directly.

![](/files/3beOJRdU8j8xEEJ7YjR4)

* **Prototype URL:** Enter the link to your prototype or design integration (e.g., Figma, Maze, Invision).\
  **Options:**
  * **Text Field:** Paste the direct URL (e.g., “<https://www.figma.com/file/...”>).
  * **Docs Reference:**
    * [Figma Integration](https://help.usejimo.com/help-center/using-jimo/integrations/figma)
    * [Maze Integration](https://help.usejimo.com/help-center/using-jimo/integrations/maze)

</details>

<details>

<summary><strong>Layout</strong></summary>

Defines how the concept preview (image or embed) is displayed within the survey.

![](/files/doszVe5bqB13K0oT5CP0)

* **Image:** Lets you add a thumbnail or static representation of the concept.\
  **Options:**

  * **Add...**: Upload an image or provide a URL for reference.

* **Radius:** Adjusts how rounded the concept’s preview corners are (default: 8px).\
  **Options:**
  * **Slider or Direct Input:** Enter a pixel or percentage value to shape the corners.

</details>

#### Interview Prompt

This step behaves like a standard modal but has one **mandatory** action—“Book interview”—to integrate with your chosen scheduling platform.

<figure><img src="/files/MVjQEbx05TMfV2rBlriG" alt=""><figcaption></figcaption></figure>

<details>

<summary><strong>Behavior</strong></summary>

![](/files/bPHb3h65K6hoV8bxGMYq)

**Actions**\
Manage how the **Primary CTA** functions when users engage with the interview prompt.\
**Options:**

![](/files/8dLZjrLz8Nj6IyT3GJE7)

* **Book Interview:** A preset action that prompts users to access a booking URL (e.g., Calendly).

  * **Booking Calendar URL:** Enter any scheduling link. (e.g., “<https://calendly.com/your-team/30min”>)
  * **Unremovable:** The “Book interview” action cannot be deleted from this prompt.

* **Add Action:** Append additional actions if you want to continue the survey flow or trigger other experiences **after** the user schedules.&#x20;

  This might include “Go to Next Step,” “Redirect,” or “Trigger Another Experience,” ensuring the flow remains flexible.

</details>

#### Thank You

Provides a closing message or final note at the end of your survey. Like a **Text Block**, it displays content without requiring a user response, but includes an optional celebratory animation.

<figure><img src="/files/qJm4BRM7yZK8UQYITwAh" alt=""><figcaption></figcaption></figure>

<details>

<summary><strong>Animation</strong></summary>

Controls the celebratory effect that plays when the user reaches the Thank You step.

![](/files/FknbdEiqn3AfFFrQvPRc) ⇒  ![](/files/DfC8TggKE8wkiFZ5LnHm)

* **Animations:** Allows you to select a fun, visual flourish to celebrate survey completion.\
  **Options:**

  * **Confettis**: Show falling confetti.
  * **Heart**: Burst of hearts.
  * **Smiley**: Cheerful smiley icon.
  * **Check**: A checkmark animation symbolizing success.

* **Duration:** Sets how long the animation lasts on-screen.\
  **Options:**
  * **Slider or Direct Input**: Enter a time in seconds (e.g., 3s).

</details>

***

### Generic Elements

This section groups parameters specific to common element types used within your Tours and Modals. Each element has its own customization options to enhance functionality and visual appeal.

#### Cross

Provides users with a way to dismiss or snooze the experience.

<figure><img src="/files/9O5mWwEYD7iCiAp6npOX" alt=""><figcaption></figcaption></figure>

<figure><img src="/files/MDayjmadrQwbM6YAOrPe" alt=""><figcaption></figcaption></figure>

<details>

<summary><strong>Behavior</strong></summary>

Defines how the cross behaves when interacted with by the user.

![](/files/SccG9C0Urw96HOdMOkXY)

* **Actions:** Defines what happens when the cross is clicked.
  * **Options:**
    * **Dismiss:** Closes the experience and logs it as dismissed in the statistics.
    * **Snooze:** Temporarily hides the experience (only available on the first step).

</details>

<details>

<summary><strong>Style</strong></summary>

Customizes the visual appearance of the cross.

![](/files/ELwEMavQjace8XimfWmz)

* **Font Size:** Sets the size of the cross icon in pixels.
  * **Options:**
    * Enter a value directly or use a slider to adjust.
* **Radius:** Adjusts the roundness of the cross box corners.
  * **Options:**
    * Percentage value to define edge roundness from sharp to fully rounded.
* **Color:** Defines the color of the cross icon.
  * **Options:**
    * Select a color using the color picker or enter a hex code.
* **Background:** Adds and selects the color of the cross background box.
  * **Options:**
    * Choose a background color or remove it by clicking the cross icon.

</details>

***

#### Profile

Display an employee profile with a name, title, and image to personify your message.

<figure><img src="/files/gdOaSDdjPu2avbceeY6X" alt=""><figcaption></figcaption></figure>

<figure><img src="/files/n3BA1J1GtT6tZr55FfoE" alt=""><figcaption></figcaption></figure>

<details>

<summary><strong>Content</strong></summary>

Manages the textual and visual information displayed in the profile.

![](/files/XNH9RqiZzeqsTt10tgBr)

* **Name:**\
  Specifies the name displayed in the profile text block.

  **Options:**

  * Enter the desired name text.
* **Title:** *(Optional)*\
  Defines the role or title in the profile text block.

  **Options:**

  * Enter the title text or leave it blank.
* **Image:**\
  Uploads a profile image or links via URL.

  **Options:**

  * **Upload:** Select an image file (maximum 5MB).
  * **URL:** Enter the direct link to the image.

</details>

<details>

<summary><strong>Style</strong></summary>

Customizes the visual aspects of the profile.

![](/files/OhcilNzd0Zqqt3VSw4jr)

* **Font Family:**\
  Choose the font for the name and title texts.

  **Options:**

  * Select from available font families.
* **Font Size:**\
  Sets the font size for the name and title in pixels.

  **Options:**

  * Enter a value directly or use a slider.
* **Color:**\
  Defines the text color for the name and title.

  **Options:**

  * Select a color using the color picker or enter a hex code.

</details>

***

#### 📸 Image / 🎬 Video / 🕹️ Demo

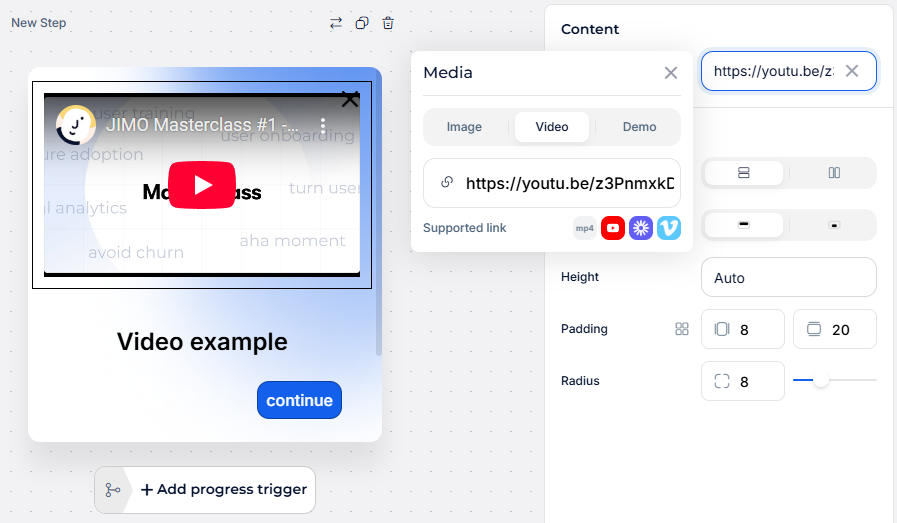
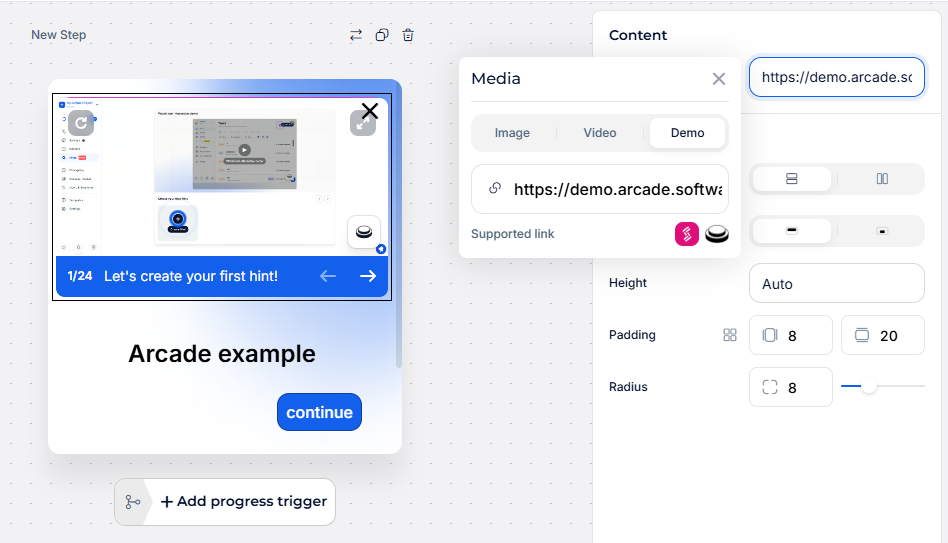
Integrate rich media into any Jimo step ― from static screenshots to hosted videos, or **interactive product demos** built with Arcade or Storylane.

<figure><img src="/files/wUsDD2X54lO2HPzdRwUq" alt=""><figcaption></figcaption></figure>

<figure><img src="/files/xZi3BCauhWyGQFZHYkrV" alt=""><figcaption></figcaption></figure>

<details>

<summary><strong>Content</strong></summary>

Handles the addition and configuration of media elements.

![](/files/nA7VK40mlmMyAYs3Au0d)

* **Media Type**

  * **Image**
    * **Upload**: Select an image file (max 5 MB).
    * **URL**: Paste a direct link to an image.
    * **Sizing Style**:
      * *Fill* – crop image to cover container.
      * *Fit* – pad so entire image is visible.
    * **Zoom on Click**: Enable or disable full-size view on click.<br>

      <figure><img src="/files/0JZiocsKmO7TDtpjXp6m" alt=""><figcaption></figcaption></figure>

  * **Video**

    * **URL**: Paste a Vimeo or YouTube link.

    **⇒ Embed:** Automatically renders an interactive player for your video.<br>

    <figure><img src="/files/eg3jb4EkVkXO9lD5OkaO" alt=""><figcaption></figcaption></figure>

  * **Demo**

    * **URL**: Paste your Arcade or Storylane share link.

    **⇒ Embed:** Automatically renders an interactive iframe of your demo.<br>

    <figure><img src="/files/6vzm81h99z7qecHtymw8" alt=""><figcaption></figcaption></figure>

</details>

<details>

<summary><strong>Style</strong></summary>

Defines the layout and appearance of the media content.

![](/files/TrHL5pduI6DQl69q5Qkn)  or  ![](/files/jNcQjc3si4agN2jmm2yz)

* **Type:**\
  Chooses the overall layout style for the media.

  **Options:**

  * **Vertical Integration:** Aligns the image vertically within the step.
  * **Horizontal Integration:** Aligns the image horizontally within the step.
* **Position:**\
  Defines the placement of the media based on the selected type.

  **Options:**

  * **Vertical:**
    * **Top:** Positions the image at the top of the step.
    * **Bottom:** Positions the image at the bottom of the step.
  * **Horizontal:**
    * **Left:** Positions the image to the left side of the step.
    * **Right:** Positions the image to the right side of the step.
* **Height/Width:**\
  Sets the size of the media.

  **Options:**

  * **Vertical:**
    * **Height:** Choose between **Auto** or specify a custom pixel size.
  * **Horizontal:**
    * **Width:** Choose between **Auto** or specify a custom pixel size using a slider or direct input.
* **Padding:**\
  Adds padding around the media content.

  **Options:**

  * **Horizontal Padding:** Specify padding in pixels.
  * **Vertical Padding:** Specify padding in pixels.
* **Radius:**\
  Adjusts the roundness of the media corners.

  **Options:**

  * Enter a percentage or pixel value to define corner roundness.

</details>

***

#### Label

Adds a text label to annotate elements within the step.

<figure><img src="/files/wFtvrdsfjCHv2BJKCIet" alt=""><figcaption></figcaption></figure>

<figure><img src="/files/zEpaHZMmYSzxfa2JrdFm" alt=""><figcaption></figcaption></figure>

<details>

<summary><strong>Content</strong></summary>

Manages the text displayed on the label.

![](/files/34dqBHt7UbFp9ZGSKdas)

* **Text:**\
  Defines the text displayed in the label.
  * **Options:**
    * Enter the desired label text.

</details>

<details>

<summary><strong>Layout</strong></summary>

Configures the styling and positioning of the label.

![](/files/qbuFsZHTepNf58IuoUuB)

* **Font Family:**\
  Choose the font for the label text.

  **Options:**

  * Select from available font families.
* **Font Size:**\
  Sets the font size for the label text in pixels.

  **Options:**

  * Enter a value directly or use a slider.
* **Font Weight:**\
  Adjusts the boldness level of the label text.

  **Options:**

  * Choose from options such as normal, bold, bolder, lighter, etc.
* **Text Color:**\
  Defines the color of the label text.

  **Options:**

  * Select a color using the color picker or enter a hex code.
* **Background:** *(Optional)*\
  Sets the background color of the label.

  **Options:**

  * Choose a color using the color picker or remove it by clicking the cross icon.
* **Border:** *(Optional)*\
  Adds a border around the label.

  **Options:**

  * Select the border color using the color picker or remove it by clicking the cross icon.
* **Padding:**\
  Adds padding inside the label between the text and its borders.

  **Options:**

  * **Horizontal Padding:** Specify padding in pixels.
  * **Vertical Padding:** Specify padding in pixels.
* **Radius:**\
  Adjusts the roundness of the label corners.

  **Options:**

  * Enter a percentage or pixel value to define corner roundness.
* **Position:**\
  Determines the placement of the label within the step.

  **Options:**

  * **Right:** Aligns the label to the right side.
  * **Centered:** Centers the label horizontally.
  *

  ```
  <figure><img src="/files/62EXkADfslRVNDRvgjq2" alt=""><figcaption></figcaption></figure>
  ```

  * **Left:** Aligns the label to the left side.

</details>

***

#### Heading

Adds a prominent title to the step for emphasis and context.

<figure><img src="/files/7AvZe3ws1lWENRQ11sTA" alt=""><figcaption></figcaption></figure>

<figure><img src="/files/4xZRT1GDDti5c8xiq7DY" alt=""><figcaption></figcaption></figure>

<details>

<summary><strong>Content</strong></summary>

Manages the title text and its advanced styling options.

![](/files/YecmoejKjO4DoeD1Cop5)

* **Title Text:**\
  Edits the title text with advanced styling options.

  **Options:**

  * **Text Editor Features:**
    * **Bold:** Make text bold.
    * **Italic:** Italicize text.
    * **Underlining:** Underline text.
    * **Insert Hyperlinks:** Add clickable links.
    * **Emoji Finder:** Insert emojis.
    * **Text Variables:** Insert dynamic user data (e.g., user’s name) that auto-updates based on the viewer.

</details>

<details>

<summary><strong>Style</strong></summary>

Customizes the visual appearance of the heading.

![](/files/1K1QruVNPhkOU2epGMED)

* **Color:**\
  Defines the color of the title text.

  **Options:**

  * Select a color using the color picker or enter a hex code.
* **Font Family:**\
  Chooses the font for the title text.

  **Options:**

  * Select from available font families.
* **Font Size:**\
  Sets the font size for the title text in pixels.

  **Options:**

  * Enter a value directly or use a slider.
* **Font Weight:**\
  Adjusts the boldness level of the title text.

  **Options:**

  * Choose from options such as normal, bold, bolder, lighter, etc.
* **Align:**\
  Determines the alignment of the title within the step.

  **Options:**

  <figure><img src="/files/OuIj2EkXujBSAzhhQLCH" alt=""><figcaption></figcaption></figure>

  * **Right:** Aligns the title to the right.
  * **Centered:** Centers the title.
  * **Left:** Aligns the title to the left.

</details>

***

#### Paragraph

Adds descriptive body text to provide detailed information within the step.

<figure><img src="/files/OuIj2EkXujBSAzhhQLCH" alt=""><figcaption></figcaption></figure>

<figure><img src="/files/62EXkADfslRVNDRvgjq2" alt=""><figcaption></figcaption></figure>

<details>

<summary><strong>Content</strong></summary>

Manages the paragraph text with advanced formatting options.

![](/files/eZNQQDziBOhPejxUg6zA)

**Text:**\
Edits the paragraph text with advanced formatting options.

**Options:**

* **Text Editor Features:**
  * **Bold:** Make text bold.
  * **Italic:** Italicize text.
  * **Underlining:** Underline text.
  * **Insert Hyperlinks:** Add clickable links.
  * **Emoji Finder:** Insert emojis.
  * **Bullet Points:** Create lists with bullet points.
  * **Multiple Paragraphs:** Add new paragraphs with line breaks.

</details>

<details>

<summary><strong>Style</strong></summary>

Customizes the visual appearance of the paragraph.

![](/files/U3dR06L6suZ8N7Qu30sd)

* **Color:**\
  Defines the color of the paragraph text.

  **Options:**

  * Select a color using the color picker or enter a hex code.
* **Font Family:**\
  Chooses the font for the paragraph text.

  **Options:**

  * Select from available font families.
* **Font Size:**\
  Sets the font size for the paragraph text in pixels.

  **Options:**

  * Enter a value directly or use a slider.
* **Font Weight:**\
  Adjusts the boldness level of the paragraph text.

  **Options:**

  * Choose from options such as normal, bold, bolder, lighter, etc.
* **Align:**\
  Determines the alignment of the paragraph within the step.

  **Options:**

  * **Right:** Aligns the paragraph to the right.
  * **Centered:** Centers the paragraph.
  * **Left:** Aligns the paragraph to the left.

</details>

***

#### Stepper

Displays the progress of the user through multiple steps.

<figure><img src="/files/8uRF6zDRQF3uxfLEVVaO" alt=""><figcaption></figcaption></figure>

<figure><img src="/files/Z1CTqFP2qED7Ktdcg5GH" alt=""><figcaption></figcaption></figure>

<details>

<summary><strong>Layout</strong></summary>

Defines the layout and style of the stepper.

![](/files/zrInsXbJ1iLy5vsX1ijz)

* **Type:**\
  Chooses the overall style of the stepper to indicate progress.

  **Options:**

  * **Dotted Line:** Shows exact step progress with dots.
  * **Bar:** Displays a full bar that progressively fills based on the percentage of steps completed.
  * **Text:** Indicates progress with text (e.g., "1 of X").
* **Position:**\
  Determines where the stepper is placed within the step.

  **Options:**

  * **Top:** Positions the stepper at the top of the step.
  * **Bottom:** Positions the stepper at the bottom of the step.
* **Align:**\
  Sets the horizontal alignment of the stepper.

  **Options:**

  * **Right:** Aligns the stepper to the right.
  * **Center:** Centers the stepper.
  * **Left:** Aligns the stepper to the left.

</details>

<details>

<summary><strong>Style</strong></summary>

Customizes the visual aspects of the stepper.

![](/files/zo1RRmbq5olRM3v9QEhP)

* **Step:**\
  Defines the color of the stepper's background, text, or inactive steps.

  **Options:**

  * Select the desired color for each element of the stepper.
* **Step Active:** *(Only for Bar or Step Types)*\
  Sets the color of the current step or the progress fill.

  **Options:**

  * Choose a color that highlights the active step or the filled portion of the progress bar.

</details>

***

#### Primary CTA

Encourages users to take a primary action within the step.

<figure><img src="/files/85K1HMOhRaerSvHPTnVJ" alt=""><figcaption></figcaption></figure>

<figure><img src="/files/5sygjHfAyKN3mYvPbshn" alt=""><figcaption></figcaption></figure>

<details>

<summary><strong>Behavior</strong></summary>

Defines the [actions triggered](/docs/build/triggers-and-conditions/steps-triggers.md#types-of-actions-then) when the CTA is clicked.

![](/files/BWYGpiaEL2cNlYZ2oPqI)

**Actions:**\
Defines the actions triggered when the CTA is clicked.

**Options:**

* **Go To Step:** Proceeds to the next step in the tour.
* **Redirect:** Redirects the user to a specified URL.
* **Trigger Experience:** Initiates another experience.
* **Combine Actions:** Allows multiple actions to be executed upon click.

**Notes:**

* **Snooze:** Only available on the first step.
* **Primary CTA Requirement:** Must include at least one "Go To Step" action to affect progression.

</details>

<details>

<summary><strong>Size</strong></summary>

Adjusts the width style of the CTA button.

![](/files/I5a9QlPiFeAmBDFFcukd)

**Width:**\
Chooses the background style of the CTA.

**Options:**

* **Fit:** Adjusts the CTA width to fit the text content.
* **Fill:** Extends the CTA to fill the entire available width.

</details>

<details>

<summary><strong>Layout</strong></summary>

Customizes the content and styling of the CTA button.

![](/files/2WLeHlgLuhxBtBq8SdS1)

* **Text:**\
  Edits the text content of the CTA button.

  **Options:**

  * Enter and style the desired button text.
* **Font Family:**\
  Chooses the font for the CTA text.

  **Options:**

  * Select from available font families.
* **Font Size:**\
  Sets the font size for the CTA text in pixels.

  **Options:**

  * Enter a value directly or use a slider.
* **Font Weight:**\
  Adjusts the boldness level of the CTA text.

  **Options:**

  * Choose from options such as normal, bold, bolder, lighter, etc.
* **Padding:**\
  Adds padding inside the CTA button between the text and the button borders.

  **Options:**

  * **Vertical Padding:** Specify padding in pixels.
  * **Horizontal Padding:** Specify padding in pixels.
* **Radius:**\
  Sets the roundness of the CTA button corners.

  **Options:**

  * Enter a percentage or pixel value to define corner roundness.
* **Text Color:**\
  Defines the color of the CTA text.

  **Options:**

  * Select a color using the color picker or enter a hex code.
* **Background:** *(Optional)*\
  Sets the background color of the CTA button.

  **Options:**

  * Choose a color using the color picker or remove it by clicking the cross icon.
* **Border:** *(Optional)*\
  Adds a border around the CTA button.

  **Options:**

  * Select the border color using the color picker or remove it by clicking the cross icon.
* **Position:**\
  Aligns the CTA button within the step.

  **Options:**

  * **Left:** Aligns the CTA to the left.
  * **Centered:** Centers the CTA.
  * **Right:** Aligns the CTA to the right.

</details>

***

#### Secondary CTA

Provides an alternative action within the step, typically for less critical actions.

<figure><img src="/files/nxols7Z9KolukKAI22Xl" alt=""><figcaption></figcaption></figure>

<figure><img src="/files/xKVFEbiZUEm3bMpX4LwL" alt=""><figcaption></figcaption></figure>

<details>

<summary><strong>Behavior</strong></summary>

Defines the [actions triggered](/docs/build/triggers-and-conditions/steps-triggers.md#types-of-actions-then) when the secondary CTA is clicked.

![](/files/yuh83ZN1UamqAYg7TkTK)

**Actions:**\
Defines the actions triggered when the Secondary CTA is clicked.

**Options:**

* **Go To Step:** Proceeds to the previous step in the tour.
* **Redirect:** Redirects the user to a specified URL.
* **Trigger Experience:** Initiates another experience.
* **Remove Go To Step:** Can remove all "Go To Step" actions to prevent affecting the current flow.

**Notes:**

* **Default Action:** Acts as a back/previous button.
* **Flexibility:** Can be used to open links or trigger experiences without impacting the current tour progression.

</details>

<details>

<summary><strong>Size</strong></summary>

Adjusts the width style of the Secondary CTA button.

![](/files/1JWEKhaAJMgez8BlzL3K)

**Width:**\
Chooses the background style of the Secondary CTA.

**Options:**

* **Fit:** Adjusts the CTA width to fit the text content.
* **Fill:** Extends the CTA to fill the entire available width.

</details>

<details>

<summary><strong>Layout</strong></summary>

Customizes the content and styling of the Secondary CTA button.

![](/files/LG8L1OUr7nKX2OcJ4Oo4)

* Edits the text content of the Secondary CTA button.

  **Options:**

  * Enter and style the desired button text.
* **Font Family:**\
  Chooses the font for the Secondary CTA text.

  **Options:**

  * Select from available font families.
* **Font Size:**\
  Sets the font size for the Secondary CTA text in pixels.

  **Options:**

  * Enter a value directly or use a slider.
* **Font Weight:**\
  Adjusts the boldness level of the Secondary CTA text.

  **Options:**

  * Choose from options such as normal, bold, bolder, lighter, etc.
* **Padding:**\
  Adds padding inside the Secondary CTA button between the text and the button borders.

  **Options:**

  * **Vertical Padding:** Specify padding in pixels.
  * **Horizontal Padding:** Specify padding in pixels.
* **Radius:**\
  Sets the roundness of the Secondary CTA button corners.

  **Options:**

  * Enter a percentage or pixel value to define corner roundness.
* **Text Color:**\
  Defines the color of the Secondary CTA text.

  **Options:**

  * Select a color using the color picker or enter a hex code.
* **Background:** *(Optional)*\
  Sets the background color of the Secondary CTA button.

  **Options:**

  * Choose a color using the color picker or remove it by clicking the cross icon.
* **Border:** *(Optional)*\
  Adds a border around the Secondary CTA button.

  **Options:**

  * Select the border color using the color picker or remove it by clicking the cross icon.
* **Position:**\
  Aligns the Secondary CTA button within the step.

  **Options:**

  * **Left:** Aligns the CTA to the left.
  * **Centered:** Centers the CTA.
  * **Right:** Aligns the CTA to the right.

</details>

[^1]: ![](/files/uJr8jfn2TjQfNmT3Zesx)

[^2]: ![](/files/Rt2n6c6iPYOYn4dUWRUc)

[^3]: ![](/files/0Pr293XhD32b0sydgJhD)

[^4]: ![](/files/G4GQrTex3idGPx8scJcM)