> For the complete documentation index, see [llms.txt](https://help.usejimo.com/docs/llms.txt). Markdown versions of documentation pages are available by appending `.md` to page URLs; this page is available as [Markdown](https://help.usejimo.com/docs/experiences/resource-center.md).
# Resource Center
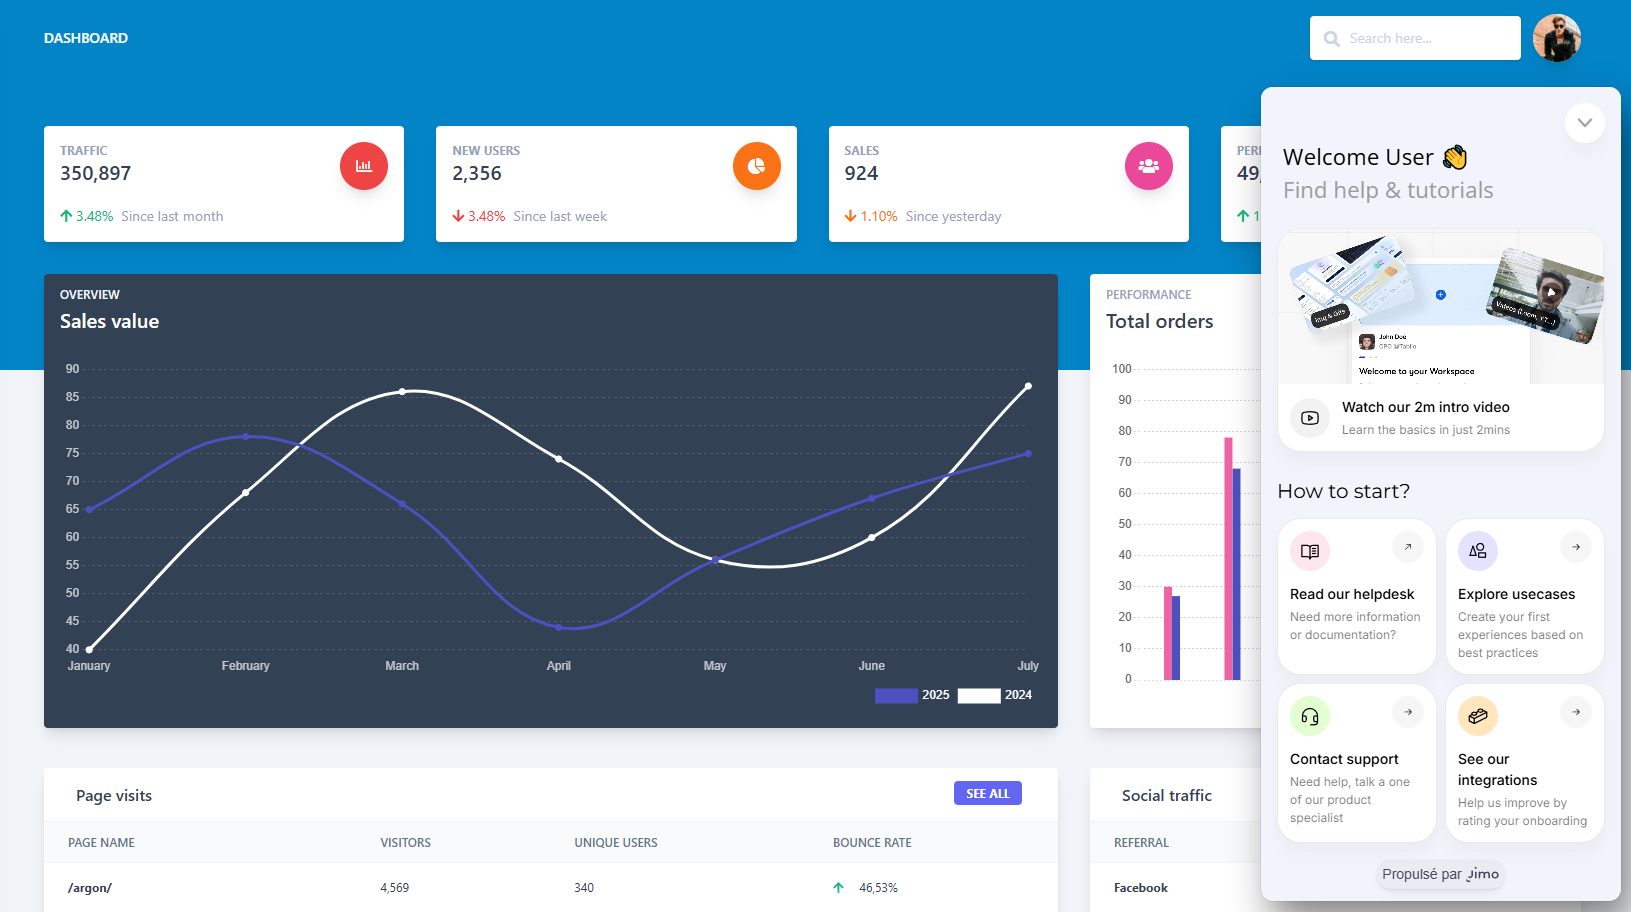
Self-serve knowledge hub where users can access aggregated experiences in one place. This ensures seamless navigation and on-demand support, enhancing user autonomy and engagement.
## What Are Resource Centers?
**Resource Centers** are **customizable in-app widgets** that provide users with **on-demand access to key resources, guides, and experiences**. They function as a **collapsible badge**, similar to the **changelog widget**, but offer **greater flexibility** by allowing multiple Resource Centers with **dynamic triggers** based on user context.
Resource Centers are ideal for **onboarding flows, support documentation, and in-app guidance**, helping users find the right information when they need it, without disrupting their experience.
***
## Overview
### 📺 Tutorial: First Resource Center
(Coming Soon)
* **Self-Serve Knowledge Hub** – Aggregate **past experiences, checklists, and hints** in a structured menu.
* **Customizable Menu & Design** – Personalize the layout with **icons, embedded media, and links** to structure resources effectively.
* **Dynamic Content Display** – Unlike the changelog, you can create **multiple Resource Centers**, triggered **based on page, user progression, or specific conditions** to provide **relevant information at the right time**.
* **Seamless Access Without Overload** – Avoid overwhelming users by **displaying only the most relevant resources**, keeping guidance contextual and effective.
***
## Use Cases
(Coming Soon) Explore our [demo website](https://explore.usejimo.com/dashboard) to see examples of Resource Centers in action. Choose between different experience examples to see how a resource center can be effectively implemented in context.
* **📚 Self-Serve Knowledge Hub**\
Aggregate previous experiences, checklists, and external links in one centralized location, allowing users to find relevant information when they need it.
* **🎯 Contextual Help & Documentation**\
Provide instant access to help articles, FAQs, or embedded media without disrupting the user workflow.
* **🛠️ Dynamic Resource Access**\
Automatically display relevant content based on user activity, progress, or page context, ensuring personalized guidance.
* **🔔 Feature & Update Announcements**\
Keep users informed by linking changelogs and announcements inside the Resource Center for easy reference.
***
### How to Access
1. **Navigate to Experiences:**\
From your [Jimo dashboard](/docs/build/dashboard.md), go to [Resource Center.](https://i.usejimo.com/resource-centers)
2. **Create or Select a Resource Center:**
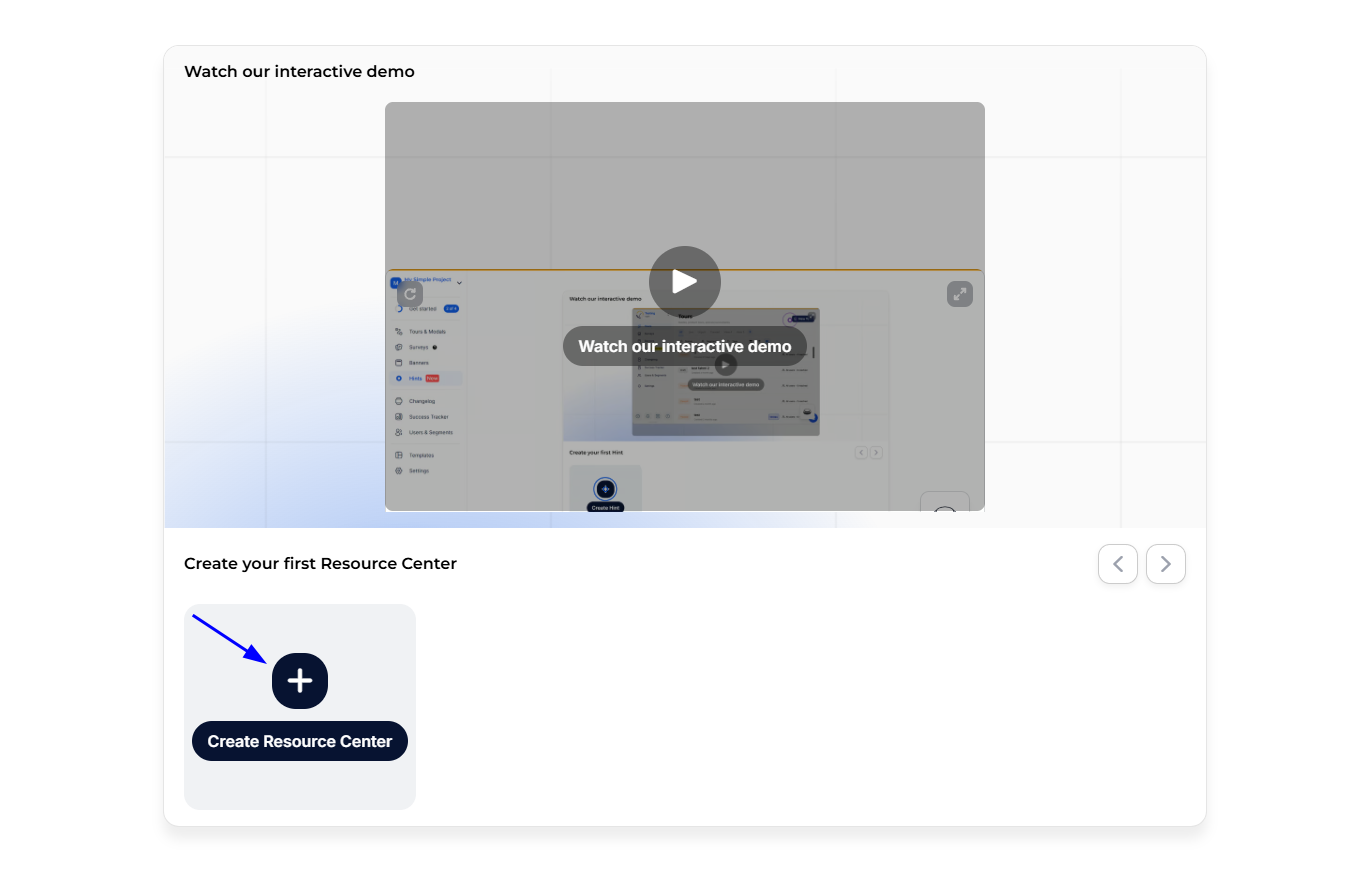
* **First-Time Users:** Click **"Create Your First Resource Center"**.
* **Returning Users:** Click the **+ New Resource Center** button in the top-right corner.
* Enter a **name** for your Resource Center, then proceed directly to the **standalone builder**.
3. **Customize Your Resource Center**
* There's no templates, use the **standalone builder** to directly structure your Resource Center.
* Add and organize **helpful links, experiences, and embedded content** to create a tailored support hub.
***
## Main Features
Jimo's Resource Center provides a robust set of features designed to centralize and enhance knowledge access for users. Unlike other sequential experiences like Tours or Checklists, the Resource Center is a **single-step** experience that remains accessible through a standalone widget.
It allows users to **self-serve** information while maintaining flexibility in design and content organization. Below is an overview of the overall process. For a detailed breakdown of resource center-specific elements and customization, visit our [**Resource Center Components page**](/docs/experiences/resource-center/components.md).
### Builder
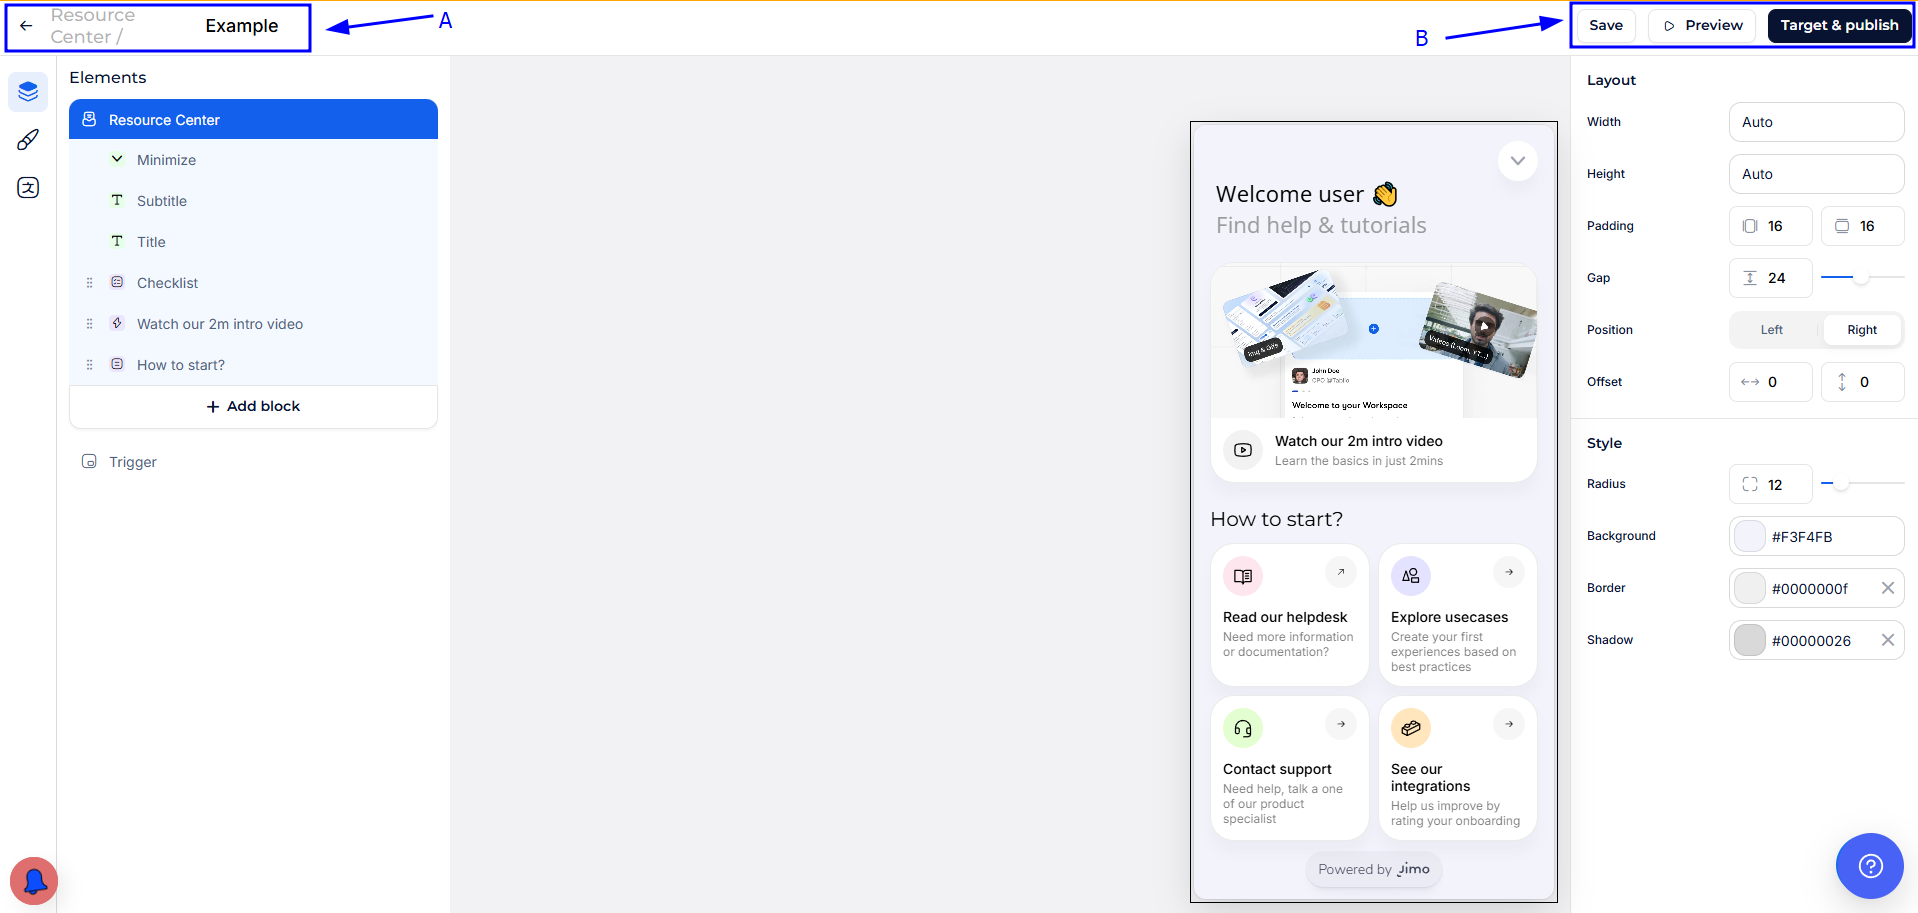
The **Resource Center Builder** is your central hub for creating and customizing your Resource Center. Unlike Tours & Modals, it does not rely on a step-by-step flow but instead provides a **single, structured interface** where you can organize and display key information.
Name and Back Button (A)
* **Edit Resource Center Name**: At the top, you can edit the name of your Resource Center for easy identification.
* **Back to Dashboard**: Use the arrow next to the name to return to the [dashboard](/docs/build/dashboard.md) where all created Resource Centers are listed.
Action Buttons (B)
* **Save:** Secure your progress with the 'Save' button, which also [automatically saves your work regularly](#user-content-fn-1)[^1].
* [**Preview:**](/docs/build/preview.md) Simulate how the Resource Center will appear and function when deployed on a specific URL.
* [**Target & Publish:**](/docs/publish/target-and-publish.md) Set the conditions for displaying the Resource Center, ensuring it appears only where needed.
***
### Content Builder
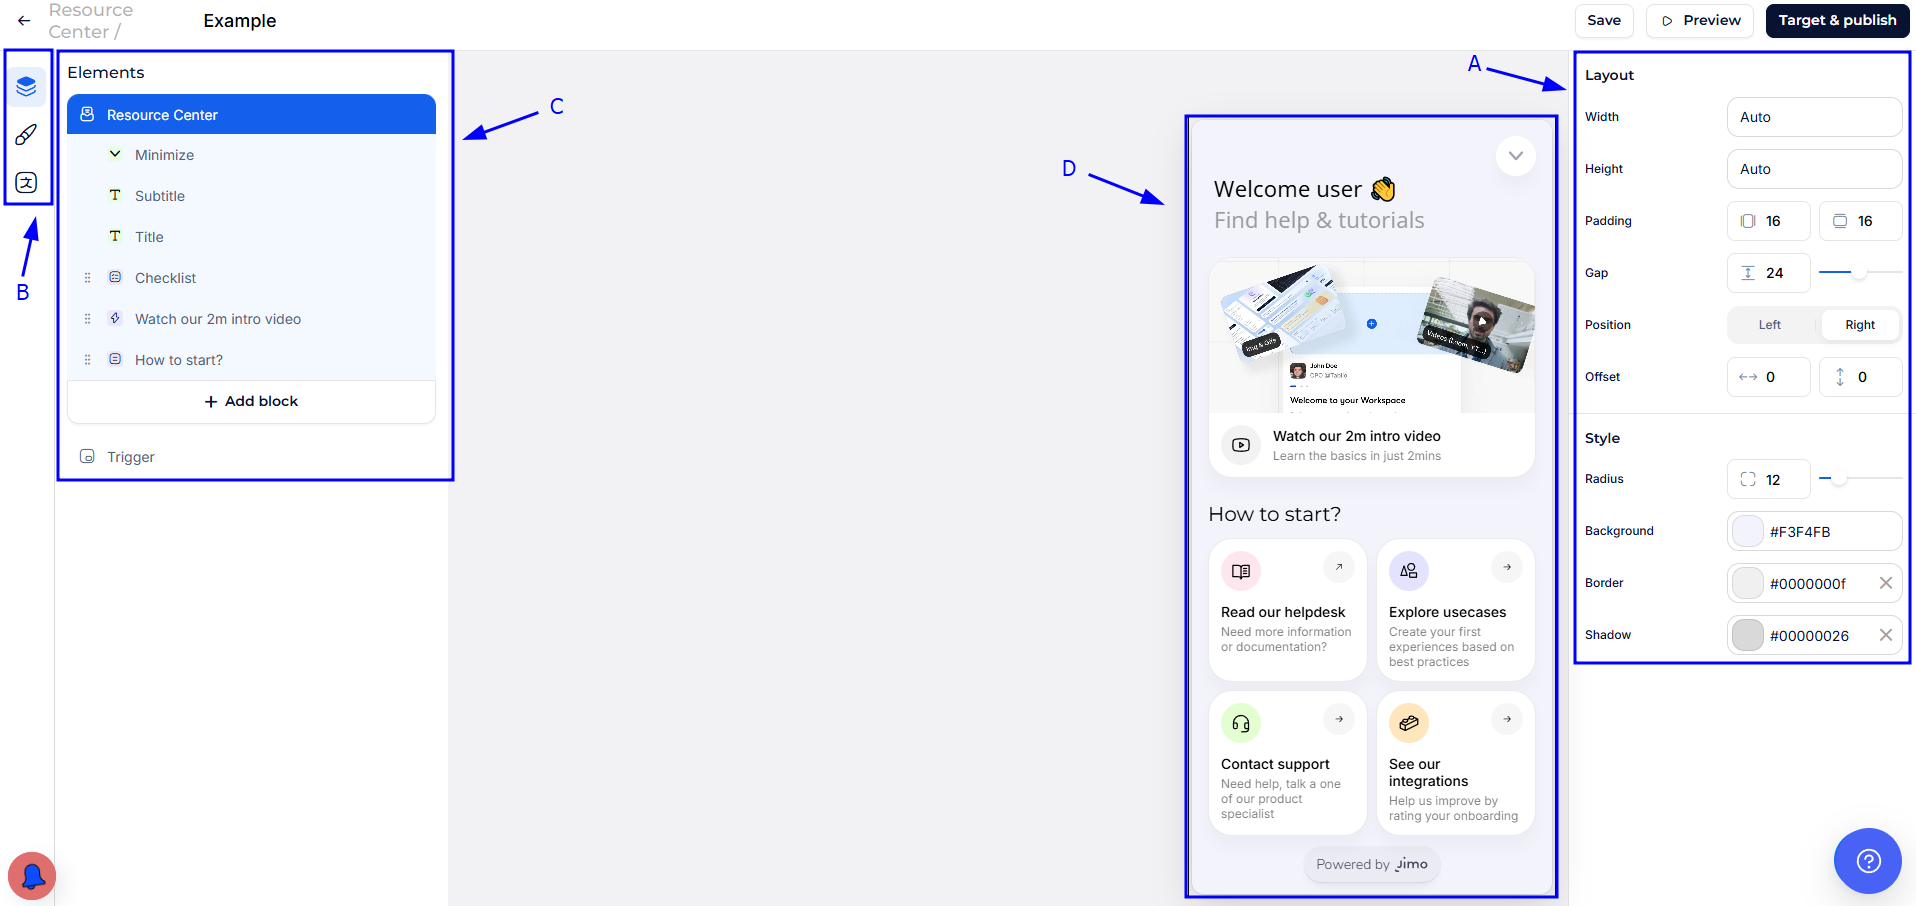
The [**Content Builder**](/docs/build/builders/content-builder.md) tab allows you to organize and fine-tune the structure of your Resource Center. You can add, arrange, and edit different content blocks to create a seamless user experience.
Properties Sidebar: Elements Editor (A)
* **Modify Attributes:** Adjust positioning, styling, and animations for the currently selected element in the navigator.
Builder Menu (B)
* [**Navigator:**](/docs/build/navigator.md) Manage and organize content blocks within the Resource Center.
* [**Themes:**](/docs/build/theme.md) Apply styling to maintain brand consistency.
* [**Translations:**](/docs/build/multiple-languages.md) Manage multiple language versions for localization.
Navigator (C)
* **Element List:** View all content blocks within the Resource Center.
* **Element Selection:** Click to edit content directly through the **Properties Sidebar**.
Live Preview (D)
* **Real-Time Editing:** View and modify content directly within the Resource Center preview.
* **Element Interaction:** Click elements to modify text, media, or settings without leaving the builder.
***
## Best Practices
{% stepper %}
{% step %}
**Keep It Organized**
Use intuitive titles, icons, and grouping to help users quickly understand and access the information they need.
{% endstep %}
{% step %}
**Prioritize Essential Content**
Include only the most useful resources, checklists, and guides to prevent overwhelming users with too much information.
{% endstep %}
{% step %}
**Leverage Multiple Resource Centers**
Create different Resource Centers based on user roles, pages, or onboarding stages to provide more relevant and contextualized content.
{% endstep %}
{% step %}
**Maintain Brand Consistency**
Apply consistent fonts, colors, and styles that align with your product’s design language to create a seamless user experience.
{% endstep %}
{% step %}
**Track Usage & Engagement**
Monitor user interactions through Jimo’s analytics to understand which resources are accessed most and refine your content accordingly.
{% endstep %}
{% endstepper %}
[^1]: